Testing
Step-by-step guide to testing Split Pay transfers in Stripe test mode. Use test card numbers, place orders, and verify transfers appear in your Stripe Dashboard.
Overview#
Before going live with Split Pay, it's essential to run test transactions to verify that transfers are being created correctly. Stripe provides a test mode that simulates payments without moving real money, allowing you to confirm your configuration end-to-end.
Always test in Stripe test mode before enabling live mode. Test mode transactions use separate API keys and do not affect your real Stripe balance.
Step-by-step testing guide#
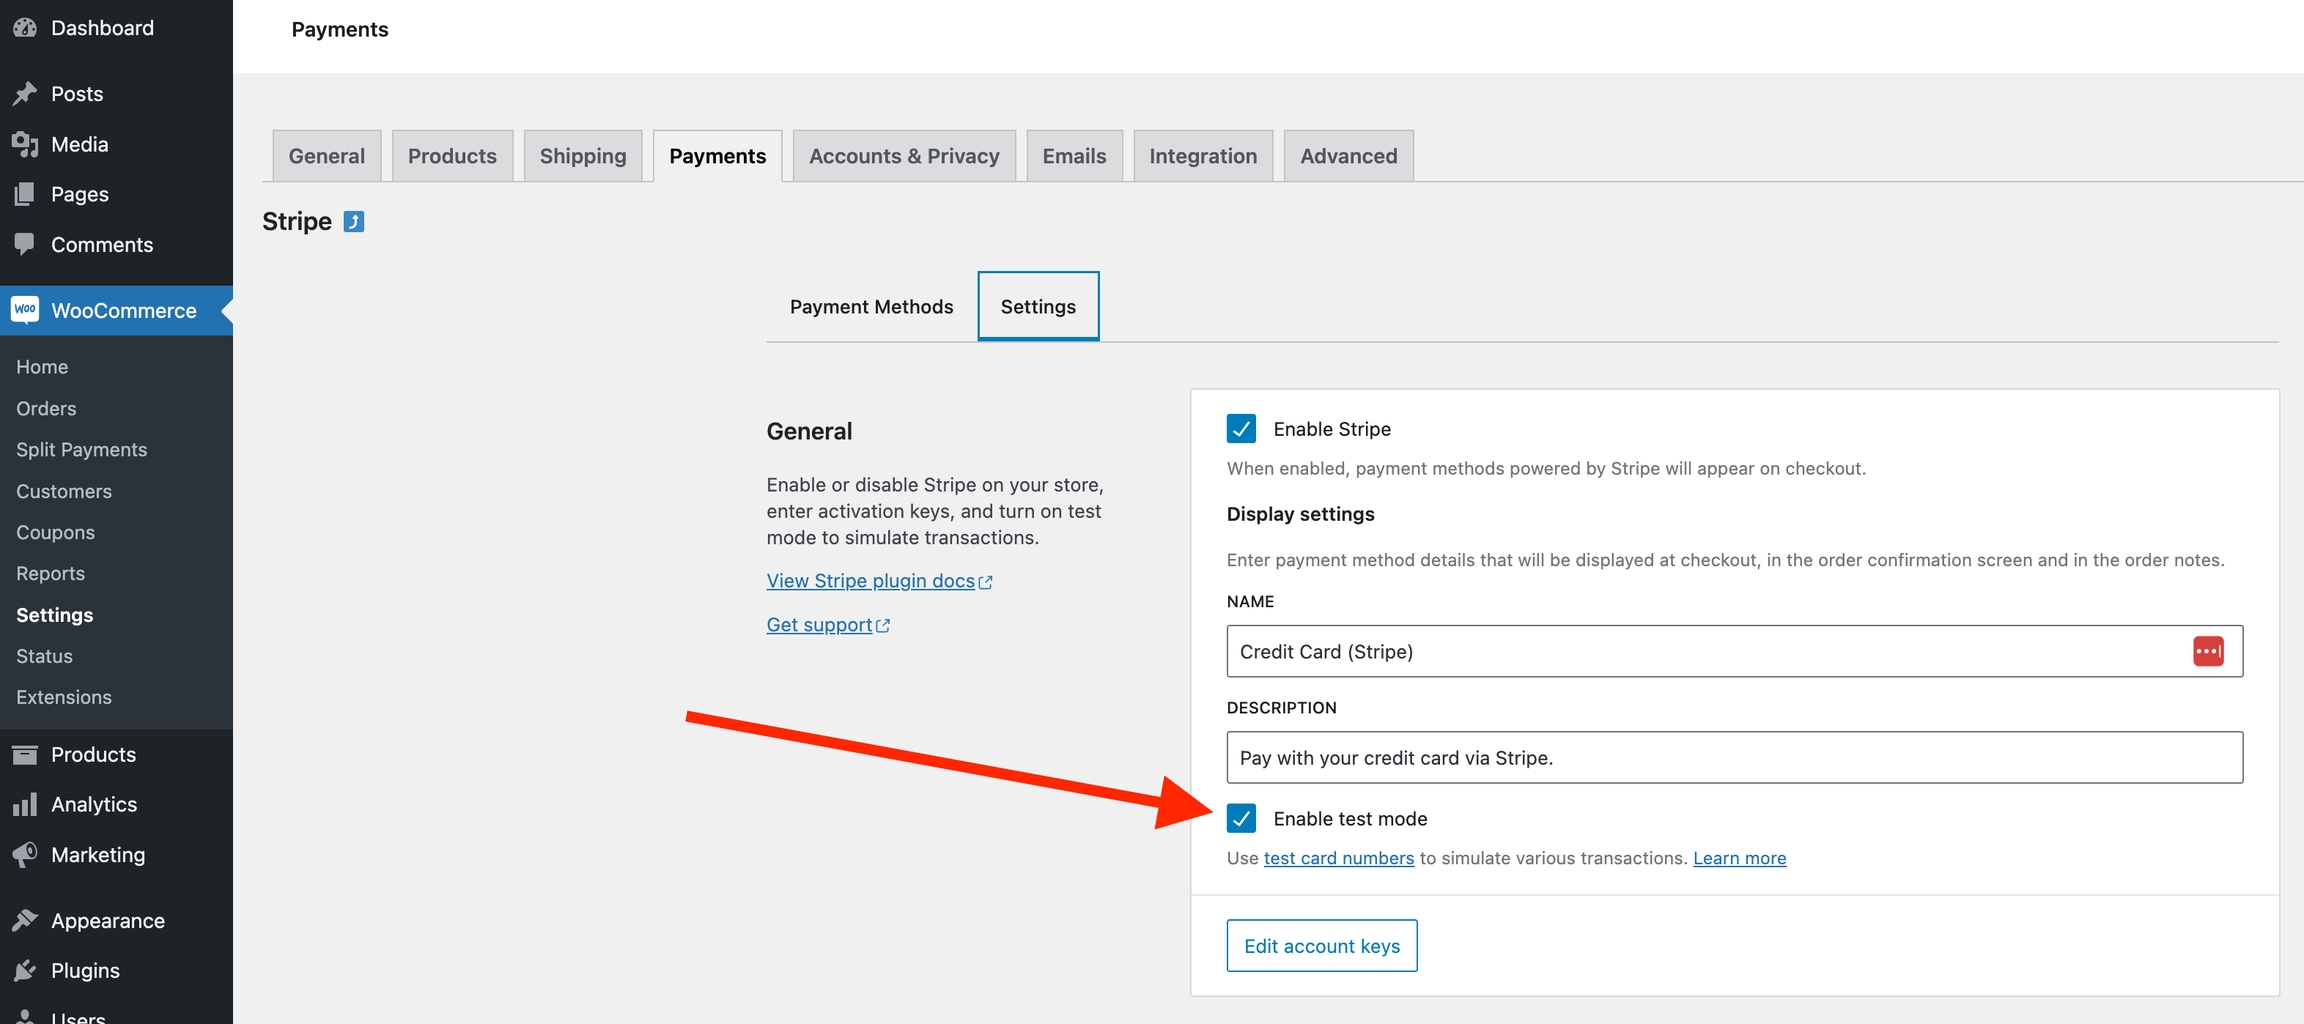
Step 1: enable Stripe test mode#
Test mode is enabled on your Stripe gateway, not on Split Pay. The location depends on which adapter you’re running:
- Official WooCommerce Stripe Payment Gateway: WooCommerce → Settings → Payments → Stripe.
- Payment Plugins for Stripe WooCommerce (
woo-stripe-payment): WooCommerce → Settings → Payments → click Manage on any of the Stripe-prefixed payment methods (or open Payment Plugins → Stripe Settings on newer versions) and toggle the gateway-wide test/live mode switch. - FluentCart built-in Stripe module: FluentCart → Settings → Payment Methods → Stripe, then switch the mode toggle from Live to Test.
Open the relevant settings page above and switch to test mode.
Enter your Stripe test publishable key and test secret key. These start with pk_test_ and sk_test_ respectively. (Restricted keys with rk_test_ are also accepted, provided they have Connect → Transfers: Write.)
Save your changes.
Find your test API keys in the Stripe Dashboard under Developers → API keys. Make sure "Test mode" is toggled on in the dashboard.
Step 2: configure Split Pay settings#
Ensure your Split Pay transfer settings are configured (global or product-level). The connected account must also be a test mode connected account. If you connected your vendor's Stripe account while in test mode, it should already be a test account.
Step 3: place a test order#
Add a product to your cart and proceed to checkout. Use Stripe's test card number:
| Field | Value |
|---|---|
| Card number | 4242 4242 4242 4242 |
| Expiry date | Any future date (e.g., 12/34) |
| CVC | Any 3 digits (e.g., 123) |
| ZIP | Any valid ZIP code (e.g., 12345) |
Complete the checkout. The order should process successfully.
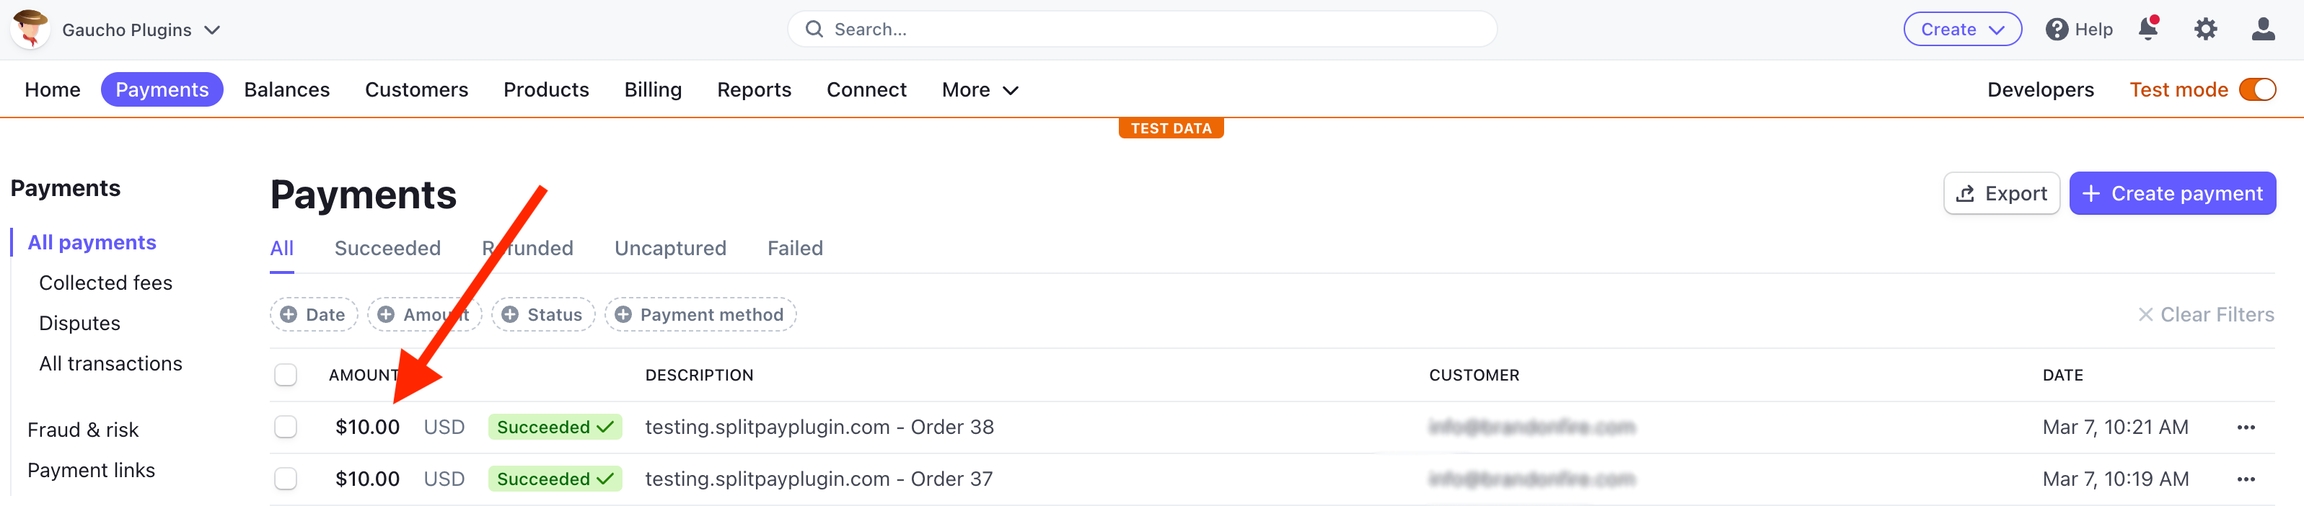
Step 4: verify the Payment in Stripe#
Log in to your Stripe Dashboard and make sure Test mode is enabled (toggle in the top right).
Navigate to Payments and click View test data. You should see the test payment listed with the order total.

You should see your test payment appear in the list:
Step 5: check the Connected account#
In the Stripe Dashboard, go to Connect → Accounts. Click on the connected account that should have received the transfer.

Scroll down to the Money Movement section and click Transfers. The transfer amount should match what you configured in Split Pay.

If the payment and transfer both appear correctly, your Split Pay configuration is working. You can safely switch to live mode by unchecking "Enable test mode" in the Stripe settings and entering your live API keys.
Additional test card numbers#
Stripe provides several test card numbers for different scenarios:
| Card Number | Scenario |
|---|---|
4242 4242 4242 4242 |
Successful payment (Visa) |
5555 5555 5555 4444 |
Successful payment (Mastercard) |
4000 0000 0000 0002 |
Card declined |
4000 0000 0000 9995 |
Insufficient funds |
4000 0025 0000 3155 |
Requires 3D Secure authentication |
For a full list, see Stripe's testing documentation.
Common testing issues#
- Payment succeeds but no transfer appears — Check that your Split Pay settings are configured and that the connected account ID is a test mode account. Verify the transfer settings are saved on the product or globally.
- "No such connected account" error — You're using a live connected account ID in test mode (or vice versa). Connected accounts have different IDs in test and live mode.
- Transfer amount is $0 — The transfer percentage or amount may be set to 0, or the product doesn't match any configured transfer rules.
- Order stuck on "pending" — Stripe test mode may not be enabled properly, or your test API keys are incorrect.
If you encounter issues during testing, see the Troubleshooting guide for detailed diagnostics.