Connecting Vendor Stripe Accounts
Connect vendor Stripe accounts using the built-in onboarding flow, the front-end [split_pay_vendor_connect] shortcode, or default Stripe Connect onboarding for receiving transfers.
Overview#
Before Split Pay can transfer funds to a vendor, that vendor must have a Stripe account connected to your platform. There are three ways to connect vendor accounts:
- Split Pay Plugin Onboarding PRO — A built-in registration and onboarding flow on your site’s standard WordPress registration page.
- Front-end shortcode PRO — The
[split_pay_vendor_connect]shortcode renders a “Connect with Stripe” button on any page so vendors can onboard without touching wp-admin (new in v3.7.0). - Default Stripe Onboarding — Manually create connected accounts through your Stripe Dashboard and share an onboarding link.
Method 1: Split Pay Plugin Onboarding PRO#
The Pro version includes a self-service onboarding flow that lets vendors register and connect their Stripe accounts without you needing to touch the Stripe Dashboard.
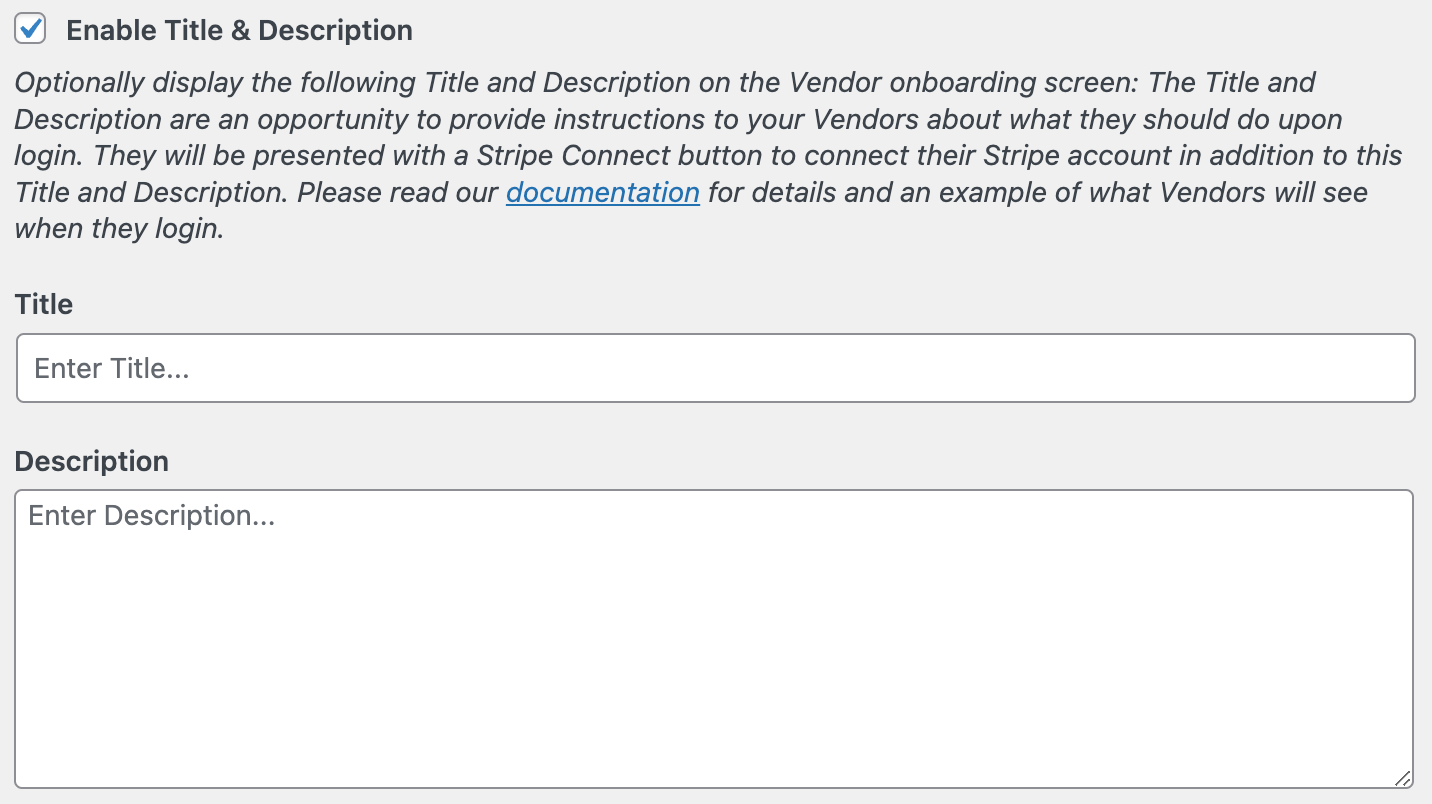
Enable vendor onboarding
Navigate to Split Pay → Vendor Onboarding (top-level menu in WordPress admin). On Split Pay versions prior to 3.7.0 this lived under WooCommerce → Split Pay Plugin → Settings.
Check the Enable Vendor Onboarding checkbox.

Save your settings.
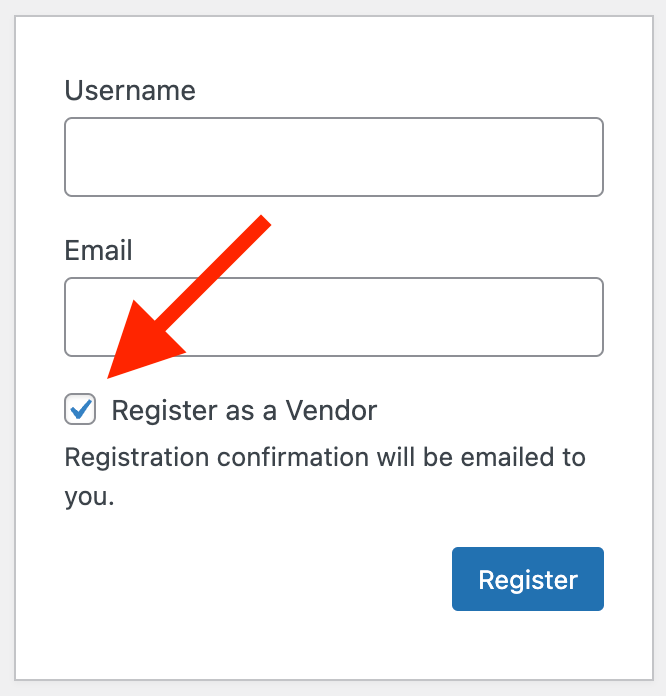
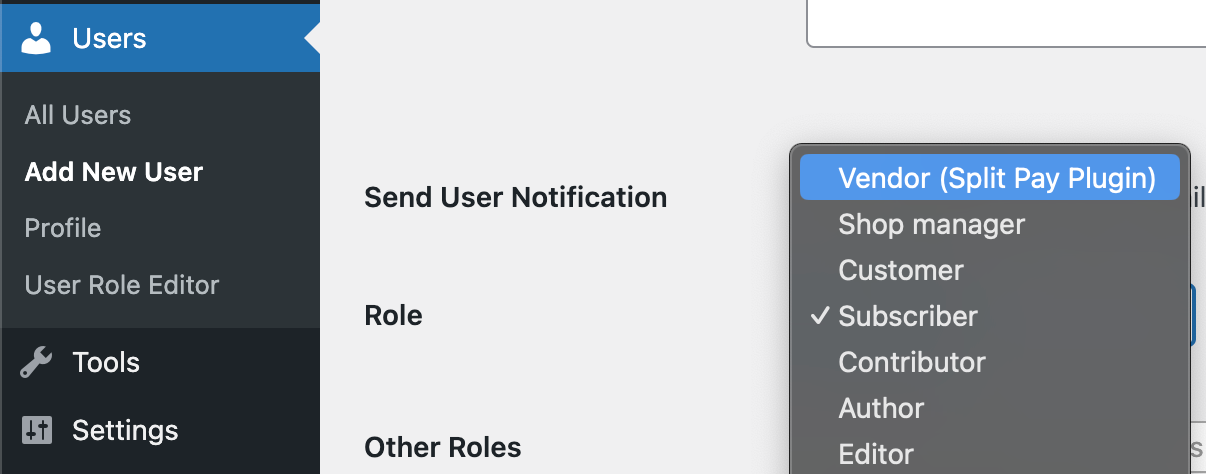
When enabled, the plugin creates a Vendor WordPress user role and adds a Register as a Vendor checkbox to your site’s existing WordPress registration page. No new page is created.
Vendor registration flow
Once onboarding is enabled, vendors can self-register:
The vendor visits your site’s standard WordPress registration page (e.g. /wp-login.php?action=register). The plugin adds a Register as a Vendor checkbox to this existing page — no new page is created in your Pages list.
They create a WordPress account with the Vendor role.
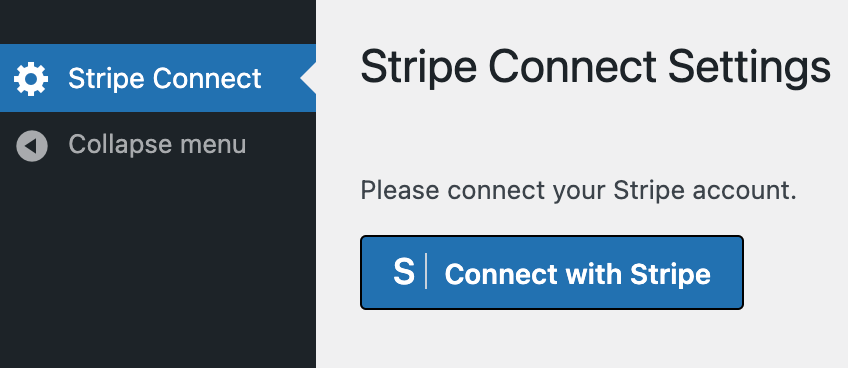
After logging in, they’re guided through the Stripe Connect onboarding process — creating or connecting their Stripe account to your platform.
Once onboarding is complete, their Stripe account ID is automatically saved to their WordPress user profile.
Hands-off setup: With the Pro onboarding flow, vendors handle their own Stripe account creation and verification. You don’t need to manage account links or share onboarding URLs manually.
Additional vendor roles
As of v3.6.0, you are no longer limited to a single “Vendor” role. In the Vendor Onboarding settings tab, the Additional Vendor Roles multi-select lets you grant any WordPress role access to the Stripe Connect onboarding page. This is useful when your site already has custom roles (e.g., “Seller,” “Artist,” “Partner”) and you want those users to connect their Stripe accounts without changing their existing role.
Managing vendors
Connected vendors appear in your WordPress Users list with the Vendor role. Each vendor’s user profile includes their connected Stripe account ID, which you can reference when configuring product-level transfers.
Front-End Vendor Onboarding Shortcode PRO#
Added in v3.7.0, the [split_pay_vendor_connect] shortcode renders a Stripe Connect onboarding button on any public page. Vendors can start (or resume) onboarding without you exposing the WordPress registration page or admin dashboard. The shortcode is platform-agnostic — it works the same on a WooCommerce site, a FluentCart site, or a hybrid site.
Internally the shortcode reuses the same Stripe Connect account + accountLink flow as Method 1. Once a vendor completes onboarding, their Stripe account ID is stored on their WordPress user profile, and Split Pay can route transfers to them just like any other connected vendor.
Syntax
Drop the shortcode into any post, page, widget, or template that accepts shortcodes:
[split_pay_vendor_connect]All four attributes are optional. You can override any subset:
[split_pay_vendor_connect
  button_label="Become a Vendor"
  connected_label="Your Stripe account is connected."
  login_label="Please log in to connect your Stripe account."
  pending_label="Stripe onboarding is in progress. Complete the steps with Stripe to finish."]
Attributes
| Attribute | Default | Shown when… |
|---|---|---|
button_label |
“Connect with Stripe” | The vendor is logged in but has not started Stripe onboarding yet. Becomes the call-to-action label on the connect button. |
connected_label |
“Your Stripe account is connected.” | The vendor has a Stripe account ID stored and the plugin’s is_onboard flag is set on their user profile. |
login_label |
“Please log in to connect your Stripe account.” | The visitor is not logged in. The shortcode also renders a “Log In” button that returns them to this page after sign-in. |
pending_label |
“Stripe onboarding is in progress. Complete the steps with Stripe to finish.” | The vendor has a Stripe account ID stored but onboarding hasn’t been completed. A Resume Stripe Onboarding button is shown alongside this message. |
Runtime states
The shortcode renders one of four states based on the current user:
- Logged out —
spp-vendor-connect spp-vendor-connect--logged-outwrapper. Showslogin_labeland a Log In button. - Logged in, no Stripe account yet —
spp-vendor-connect spp-vendor-connect--connectwrapper. Shows the primarybutton_labelbutton. Clicking it creates a Stripe Standard account, generates an account link, and redirects the vendor to Stripe’s hosted onboarding. - Logged in, onboarding pending —
spp-vendor-connect spp-vendor-connect--pendingwrapper. Showspending_labeland a Resume Stripe Onboarding button that re-opens the existing Stripe account link. - Logged in and connected —
spp-vendor-connect spp-vendor-connect--connectedwrapper. Showsconnected_labelonly.
You can style any of these states using the wrapper class names listed above.
Where to place it
- A dedicated Become a Vendor landing page on your site.
- The vendor’s profile or dashboard page (an account-area template).
- Inside a sidebar widget on pages where you want to recruit vendors.
- Anywhere the standard WordPress shortcode runner is invoked — including FluentCart product pages, WooCommerce account pages, and Gutenberg/Classic-Editor content.
Required capabilities and configuration
- Visitor: any logged-in WordPress user can use the connect button — no extra capability is required. The shortcode does not check for the Vendor role, so you can either combine it with Method 1 (vendors register via the standard WP registration page first) or wire your own access control around the page that hosts the shortcode.
- Site administrator: Split Pay must already have a Stripe platform secret key configured (either via the WooCommerce-Stripe-gateway-derived option
stripe_api_secret_key/stripe_test_api_secret_key, or via the corresponding Integrations tab gateway card). If no secret key is configured, the connect action returns a friendly “Stripe is not yet configured by the site administrator” error and no account is created. - HTTPS: Stripe Connect onboarding URLs only function over HTTPS. Make sure your site is served with a valid TLS certificate before pointing vendors at the page.
Example
A minimal “Become a Vendor” page might contain:
<h1>Join the marketplace</h1>
<p>Sign up and connect your Stripe account to start receiving payouts.</p>
[split_pay_vendor_connect button_label="Become a Vendor"]
On the same page you can customise the messaging for other states without changing markup:
[split_pay_vendor_connect
  button_label="Connect Stripe"
  connected_label="You’re all set — payouts will land in your Stripe account."
  login_label="Log in to start your vendor onboarding."
  pending_label="Almost there — finish your Stripe verification."]
Operational notes
- Connect actions hit
connect.stripe.comon Stripe’s hosted onboarding. Don’t whitelist a different domain in any security plugins you have running. - Each connect action carries a one-time nonce (
_spp_connect_nonce). Don’t cache the page output too aggressively or vendors may receive an “Invalid request” error if the nonce expires before they click. - The shortcode creates Stripe accounts with the legacy
type=standardflag (equivalent in Connect Accounts v2 to a controller where the vendor sees the full Stripe Dashboard and signs Stripe’s ToS directly). For Express- or Custom-style controller behaviour, use the admin-managed onboarding (Method 1) or default Stripe Dashboard onboarding (Method 3) until a future release exposes the account configuration as a shortcode attribute.
Method 2: default Stripe onboarding (free)#
With the free version (or if you prefer manual control), you can create connected accounts directly through the Stripe Dashboard.
Log in to your Stripe Dashboard.
Navigate to Connect → Accounts (or More → Connect depending on your dashboard layout).
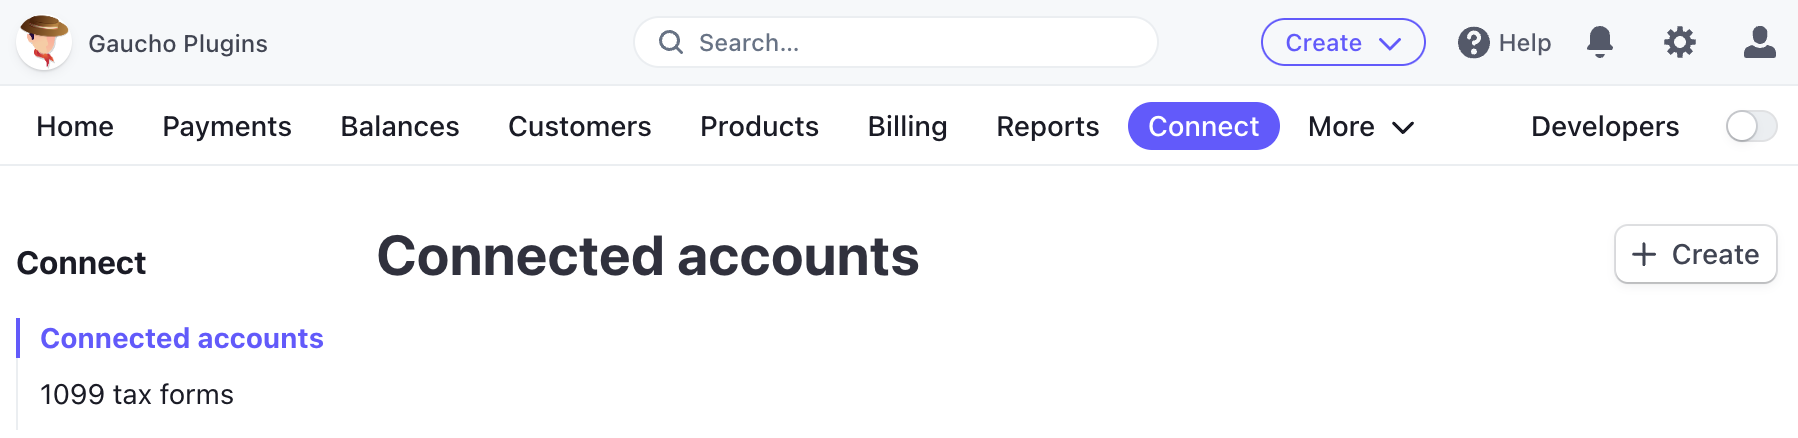
Click Create to add a new connected account.
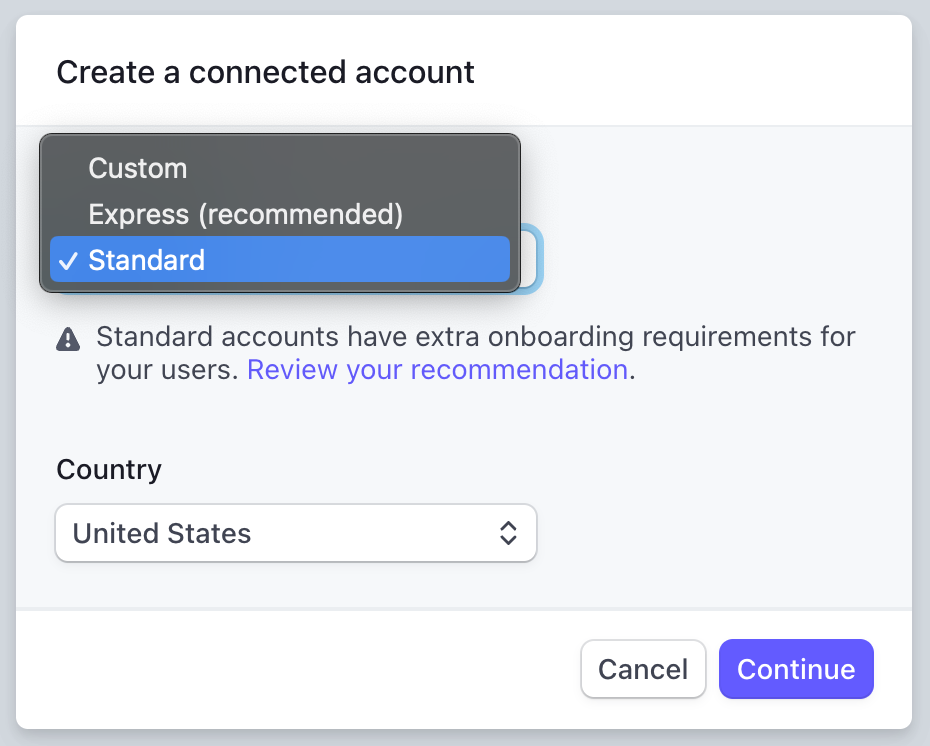
Choose the account configuration based on your needs. Stripe’s legacy v1 framing of Standard, Express, and Custom is being replaced by Connect Accounts v2, where you choose individual controller properties (who handles dashboard access, fees, losses, and onboarding) instead of picking one of three preset types. Stripe Dashboard new-account creation now expresses these as guided choices.
Roughly speaking, the legacy types map onto v2 controller properties as follows:
- Standard (legacy) ≈ controller where the vendor sees the full Stripe Dashboard, signs Stripe’s ToS directly, and is responsible for fees/losses. Easiest setup.
- Express (legacy) ≈ controller where Stripe runs the streamlined Express dashboard for the vendor and handles most identity verification.
- Custom (legacy) ≈ controller where your platform owns the entire UX and risk surface (no Stripe-hosted dashboard). Requires more development work.
Both v1 type-based accounts and v2 controller-property accounts can receive Split Pay transfers; the choice only affects who manages onboarding and the dashboard. See Stripe’s Connect accounts reference for the current decision matrix.
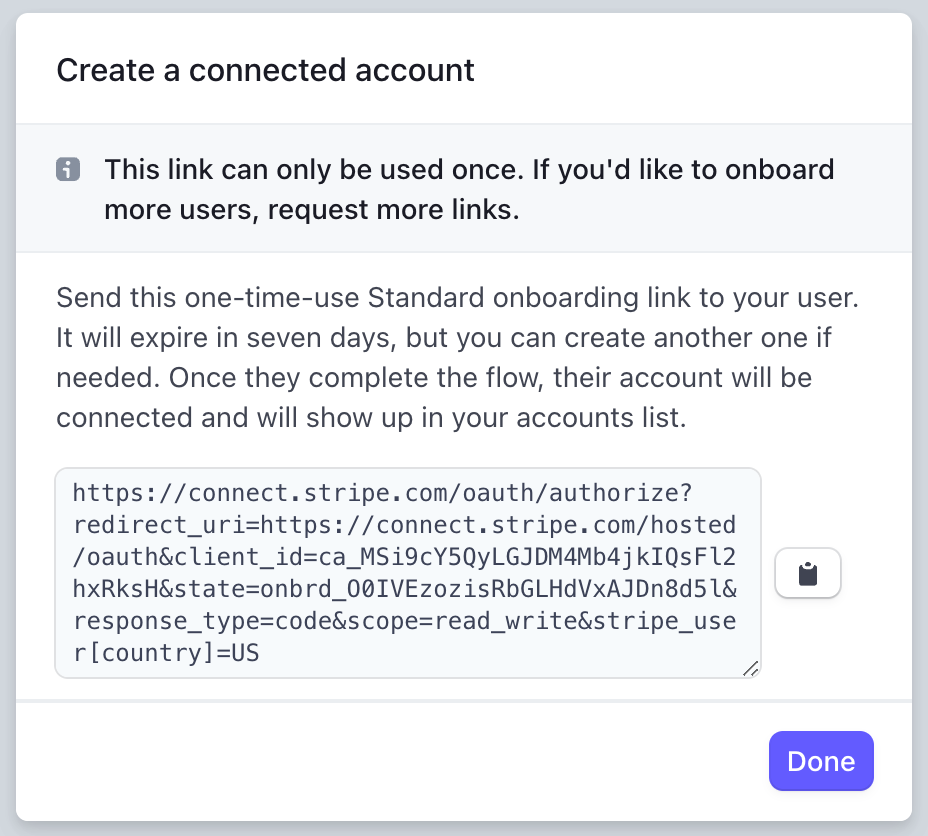
Stripe generates an onboarding link. Send this link to your vendor so they can complete their account setup.
Once the vendor completes onboarding, copy their Stripe Account ID (starts with acct_) from the Stripe Dashboard.
Paste the account ID into your Split Pay settings — either in the global settings or on individual products.

For testing, use Stripe’s test mode connected accounts. Toggle between test and live mode in your Stripe Dashboard to manage test accounts separately.
Account requirements#
Regardless of which method you use, connected accounts must meet these requirements before they can receive transfers:
- The account must have completed Stripe onboarding (identity verification, banking details, etc.).
- The account must be enabled for transfers — Stripe may require additional verification for some account types or countries.
- The account must be connected to your platform’s Stripe account (not a different platform).
- The account must be in the same country/region as your platform, or within the supported cross-border corridor (US, Canada, UK, EEA, and Switzerland). Accounts outside this corridor cannot receive transfers. See International Transfers for details.
Test vs. Live: Connected accounts created in test mode cannot receive live transfers, and vice versa. Make sure you’re using the correct mode when setting up vendor accounts.
Finding the Stripe account ID#
Every connected Stripe account has a unique identifier that starts with acct_. You can find it in:
- Stripe Dashboard: Go to Connect → Accounts, click on the account, and the ID appears at the top of the page.
- Vendor user profile: If using the Pro onboarding flow, the account ID is saved to the vendor’s WordPress user profile automatically.