Quick Start
Step-by-step guide to installing and configuring Split Pay on WooCommerce or FluentCart with any of the three supported Stripe gateway adapters — including Stripe API setup, webhook syncing, and connected accounts.
Prefer setup with an AI assistant? Download our Split Pay Setup Skill — a self-contained playbook any AI tool (Claude, ChatGPT, Cursor, etc.) can use to walk you through this configuration interactively, including diagnosis of the most common “why aren’t transfers happening” problems. The Quick Start steps below also work fine on their own.
Required plugins — pick your stack#
Since v3.7.0, Split Pay supports two e-commerce platforms and three Stripe gateway adapters. Pick whichever stack fits your store. Internally, the plugin loads when either a WooCommerce stack or a FluentCart stack is detected on plugins_loaded; the official WooCommerce Stripe gateway is no longer uniquely required.
| Stack | Plugins required | Notes |
|---|---|---|
| Stack A — WooCommerce |
WooCommerce (storefront, products, cart, checkout)
+ one Stripe gateway plugin:
+ Split Pay Plugin |
Either Stripe gateway plugin satisfies the requirement; you can also have both installed and Split Pay will register a separate gateway card per gateway on the Integrations tab. |
| Stack B — FluentCart 3.7.0+ |
FluentCart with its built-in Stripe payment module enabled
+ Split Pay Plugin |
Standalone — WooCommerce is not required. See the FluentCart integration page for setup specifics. |
The matching codebase check lives in bsd-split-pay-stripe-connect-woo.php (lines 185–190) and looks roughly like:
$has_wc_integration = is_plugin_active( 'woocommerce/woocommerce.php' )
    && ( is_plugin_active( 'woocommerce-gateway-stripe/woocommerce-gateway-stripe.php' )
        || is_plugin_active( 'woo-stripe-payment/woo-stripe-payment.php' ) );

$has_fc_integration = is_plugin_active( 'fluent-cart/fluent-cart.php' );

if ( ! $has_wc_integration && ! $has_fc_integration ) { /* show admin notice */ }
Activation does not block on missing dependencies. Split Pay’s activation hook only checks WordPress ≥ 5.0. If neither stack above is detected, the plugin still activates — it just shows an admin notice (“The Split Pay Plugin requires either WooCommerce with a Stripe gateway plugin, or FluentCart with Stripe configured”) and skips loading the transfer engine until you install one of the supported stacks.
The step-by-step Quick Start below uses Stack A with the official WooCommerce Stripe Payment Gateway as the worked example. If you’re running Payment Plugins or FluentCart instead, the Split Pay configuration steps are identical — only the gateway-side setup (the section just below) differs. See Integrations Tab for how the per-platform / per-gateway cards work, and the dedicated Payment Plugins and FluentCart pages for stack-specific gateway configuration.
Stripe transfer requirements#
Before configuring the plugin, make sure you understand Stripe’s requirements for transfers. Failing to meet these requirements will cause transfers to fail:
Stripe enforces these rules for all transfers:
- Minimum transfer amount: Each transfer must be at least $0.50 USD (or the equivalent in your currency). Transfers below this amount will fail.
- Same country/region: Your platform and connected accounts must be in the same country or region. Stripe supports cross-border transfers between the US, Canada, UK, EEA, and Switzerland. Outside that corridor, accounts must be in the same country. See International Transfers for details.
- Sufficient available balance: Your platform’s available Stripe balance must have enough funds to cover the transfer at the moment Stripe attempts it. Stripe pulls transfer funds from your available balance, not the pending balance — charges only become available once they have settled (typically T+2 for cards in the US, longer for some payment methods). If your platform’s available balance is too low when a transfer fires, Stripe rejects with an insufficient-funds error and the transfer is logged as failed.
- Single platform connection: Each connected account can only be connected to one platform at a time. If an account is already connected to another platform, it must be disconnected first.
Configuring your Stripe gateway#
Whichever stack you picked, the Stripe gateway plugin needs to be connected to your Stripe platform account before Split Pay can create transfers. Pick the path that matches your stack:
Stack A1 — official WooCommerce Stripe Payment Gateway
The default and most common path. Set up the official WooCommerce Stripe Payment Gateway as follows:
Open the Stripe settings page. In your WordPress admin, navigate to WooCommerce → Settings → Payments → Stripe. You can also go directly to:/wp-admin/admin.php?page=wc-settings&tab=checkout§ion=stripe
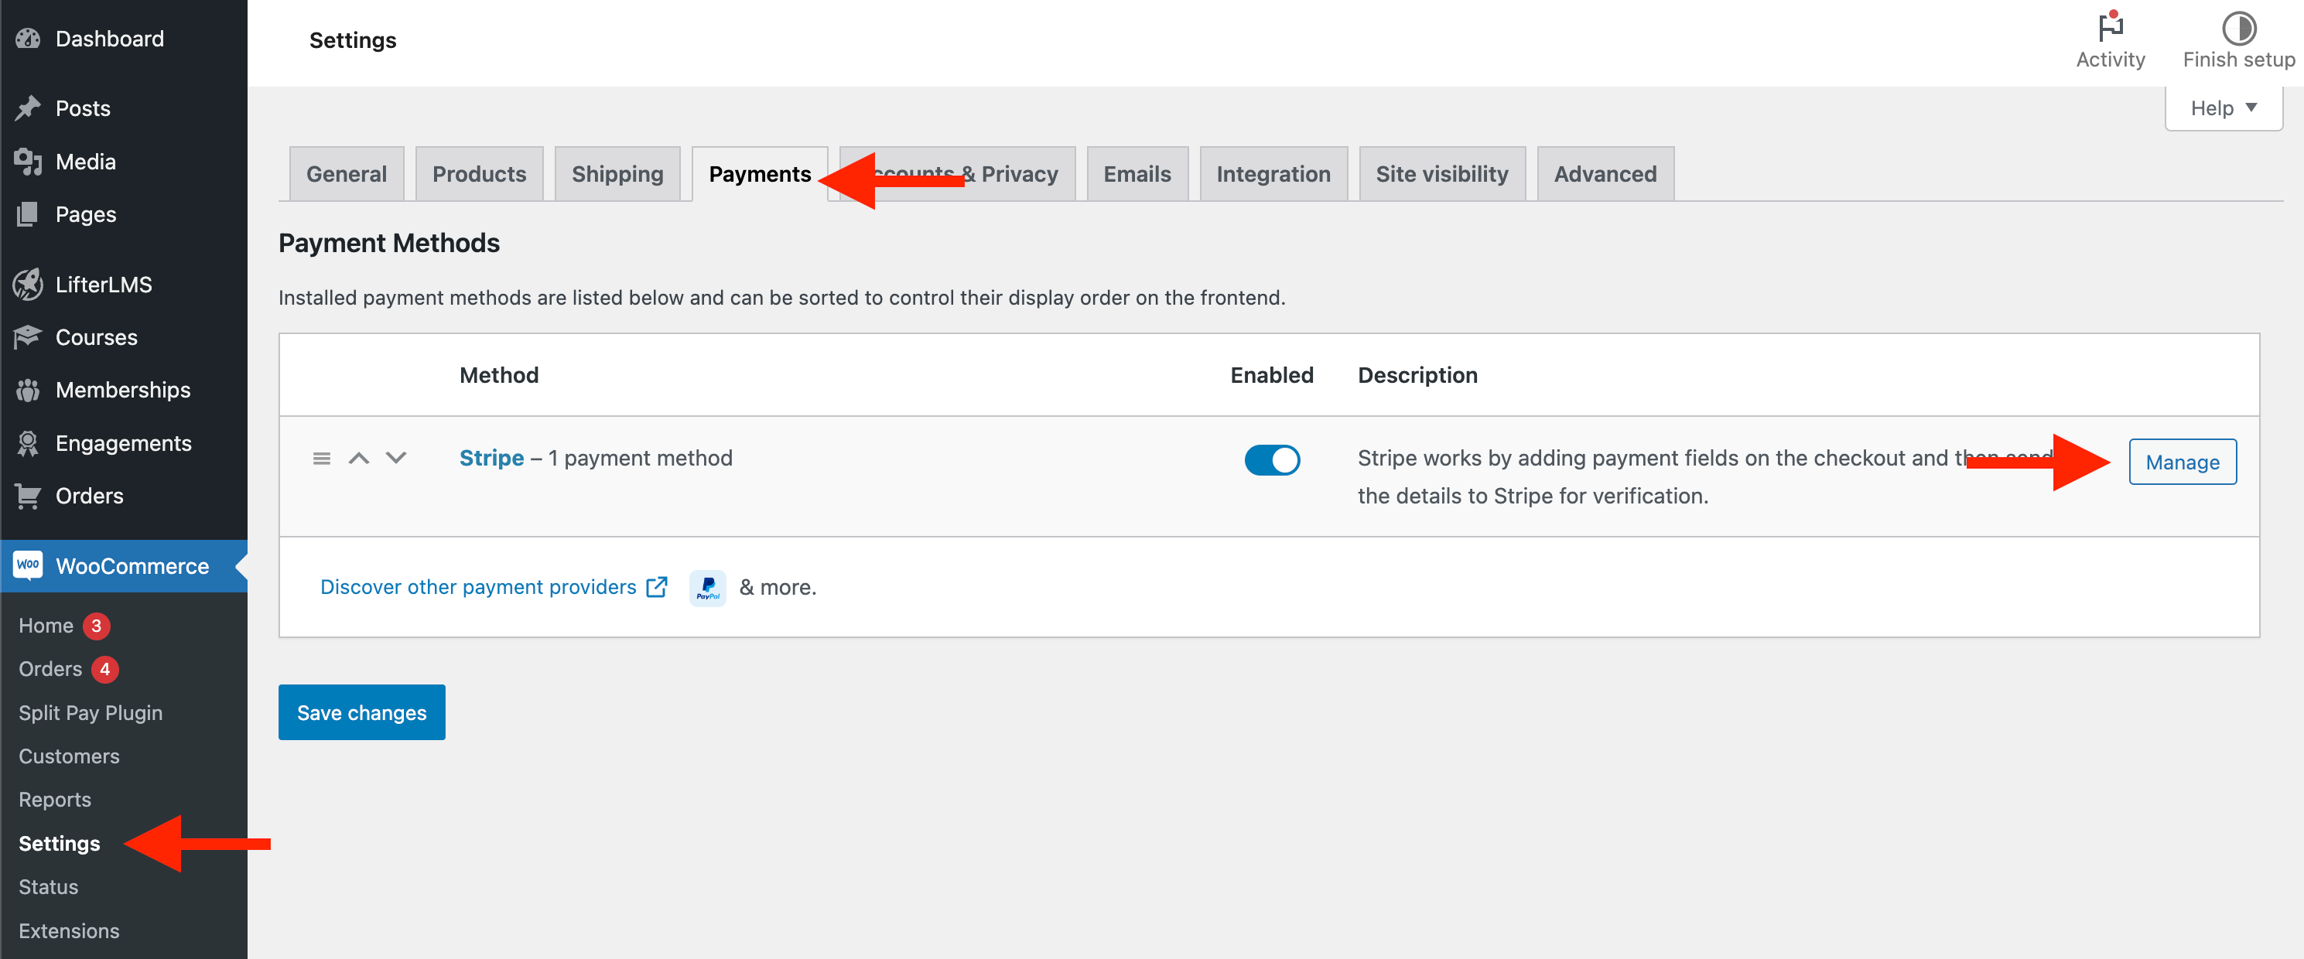
Go to the Settings tab within the Stripe payment method configuration.
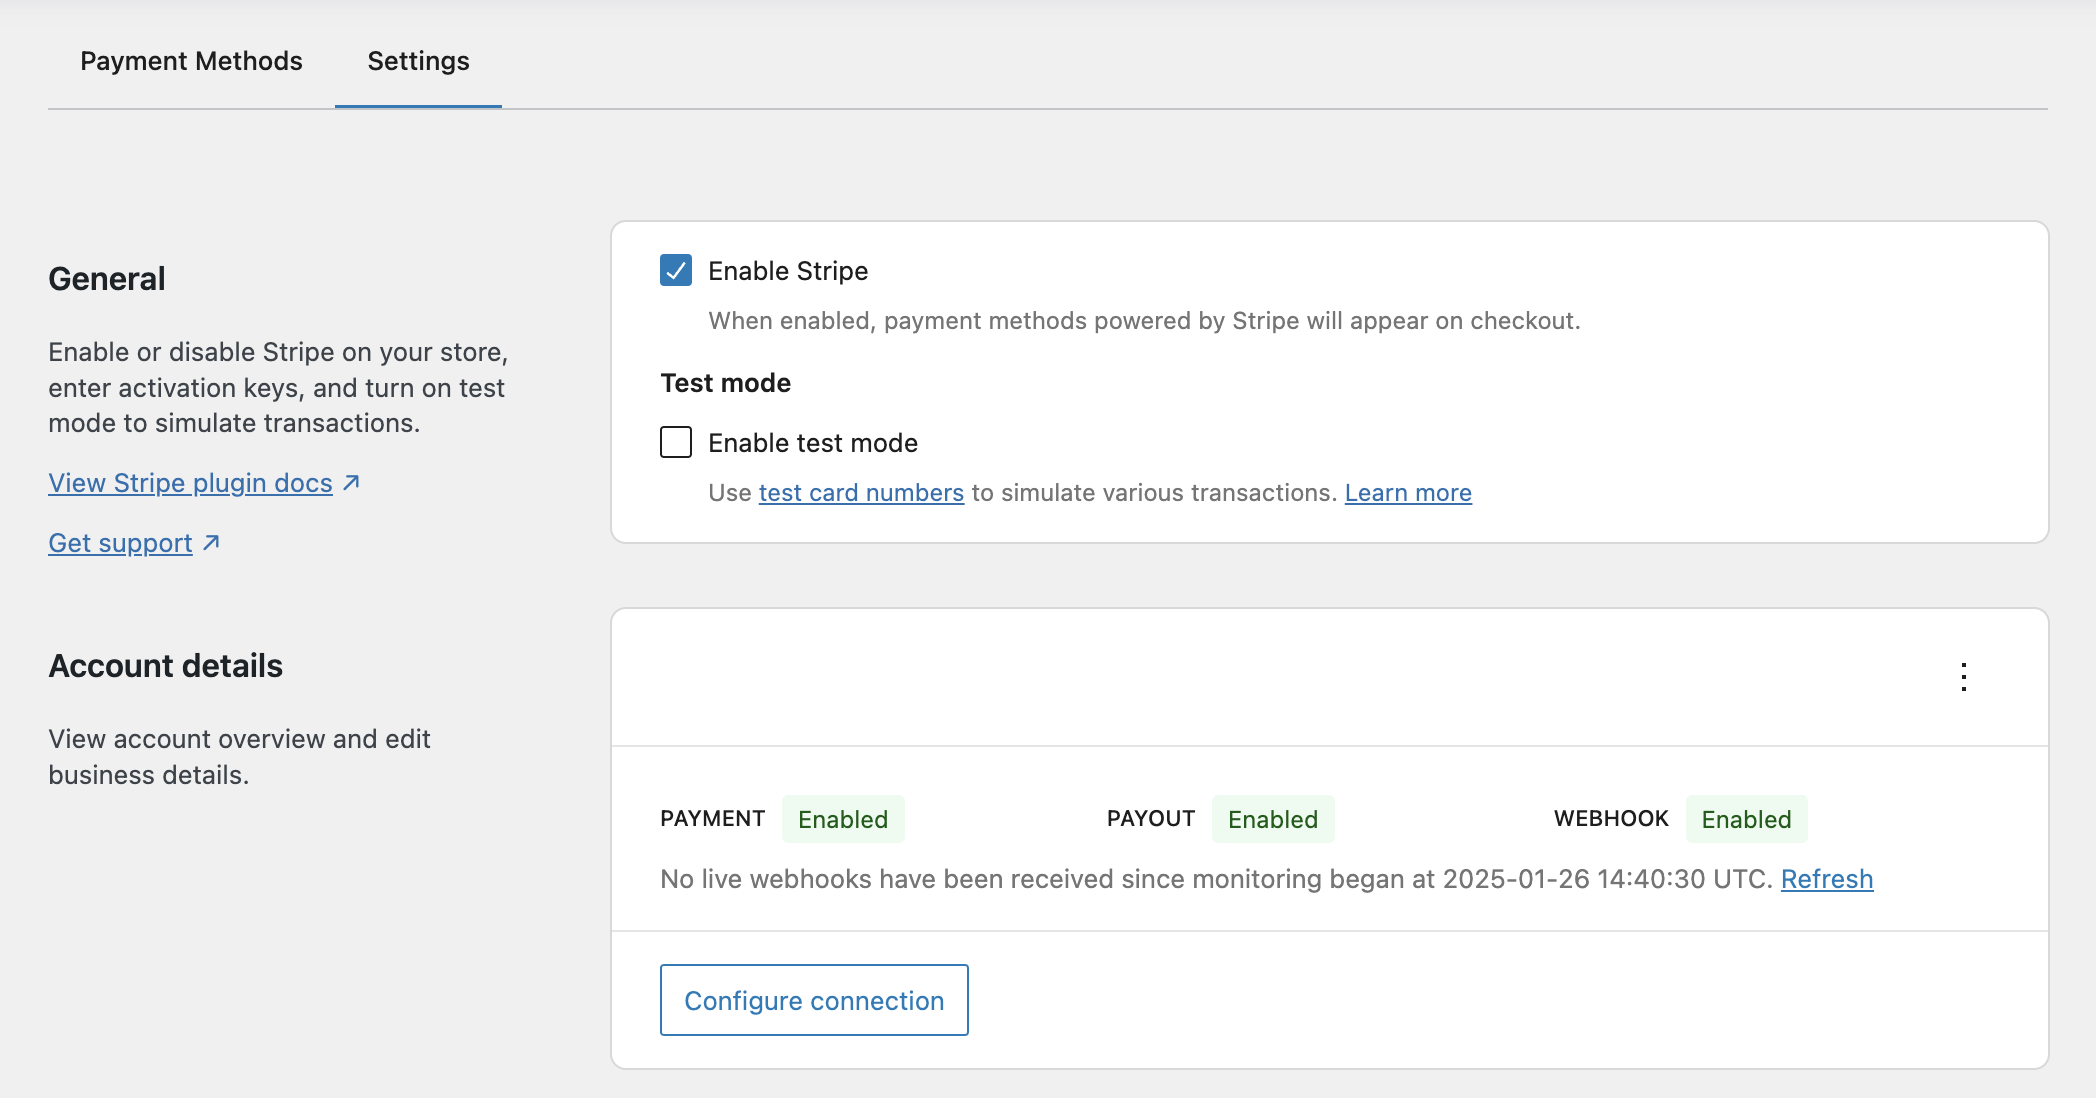
Connect your Stripe account. Click the “Create or connect an account” button. This will redirect you to Stripe where you’ll either sign in to an existing Stripe account or create a new one. Once authorized, you’ll be redirected back to your WordPress site.
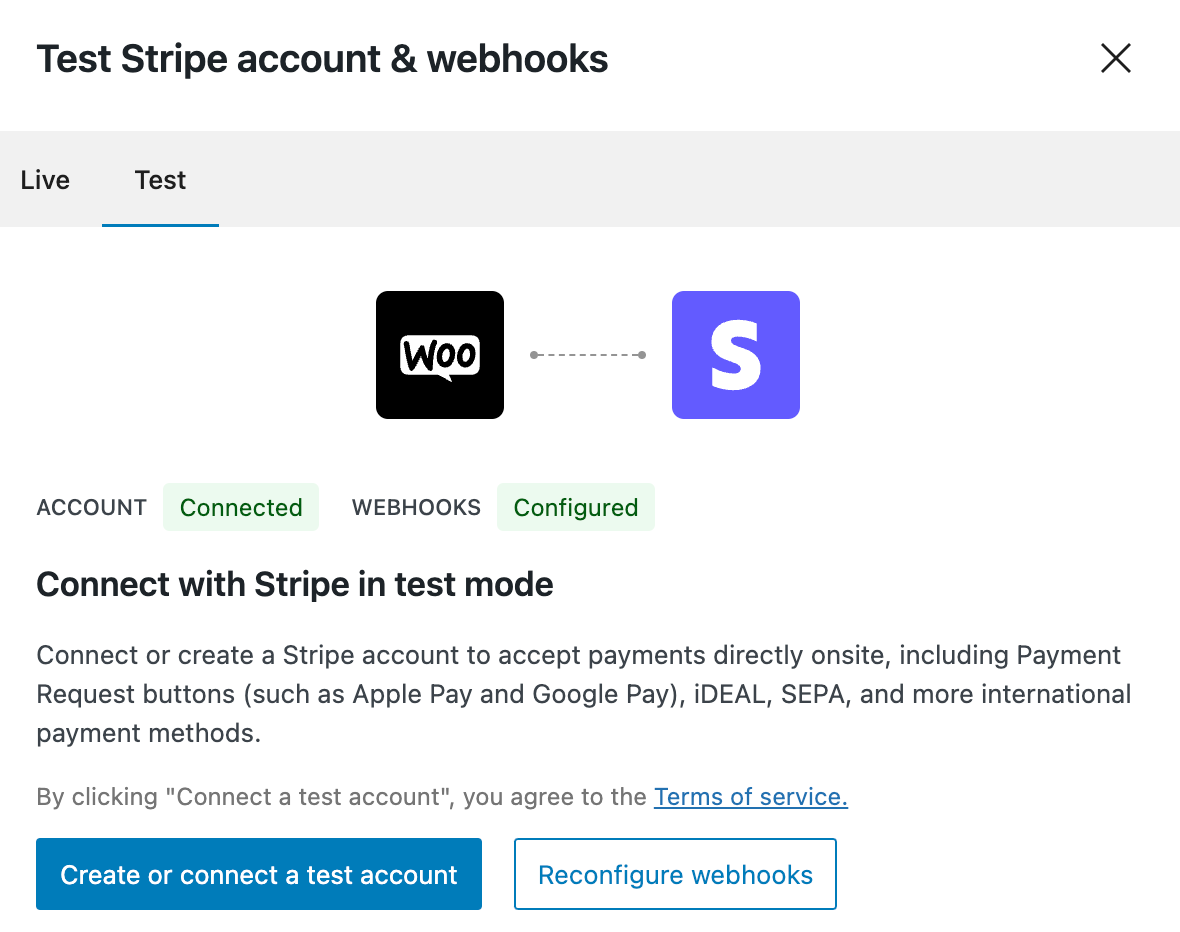
Verify the webhook endpoint. After connecting, a webhook endpoint is automatically created in your Stripe Dashboard to track payment events between WooCommerce and Stripe.
The WooCommerce Stripe Payment Gateway automatically creates a webhook endpoint when you connect your account. You do not need to manually create one for the Stripe gateway itself.
Stack A2 — Payment Plugins for Stripe WooCommerce
If you use Payment Plugins’ woo-stripe-payment instead of (or alongside) the official gateway, the gateway-side setup is similar but lives at WooCommerce → Settings → Payments → Stripe (Payment Plugins). Split Pay detects the Payment Plugins gateway via function_exists( 'stripe_wc' ) and registers a dedicated card for it on the Integrations tab.
Follow the gateway-specific instructions on the Payment Plugins for Stripe WooCommerce integration page, then return here to Configuring Split Pay — the API-key, webhook-sync, and connected-account steps are identical.
Stack B — FluentCart built-in Stripe
FluentCart ships its own Stripe payment module — you do not install a separate Stripe plugin. Configure FluentCart’s Stripe module from FluentCart → Settings → Payment Methods → Stripe. Split Pay detects the FluentCart Stripe gateway via the FluentCart\App\Modules\PaymentMethods\StripeGateway\Stripe class.
Follow the platform-specific instructions on the FluentCart integration page, then return here to Configuring Split Pay.
Configuring Split Pay#
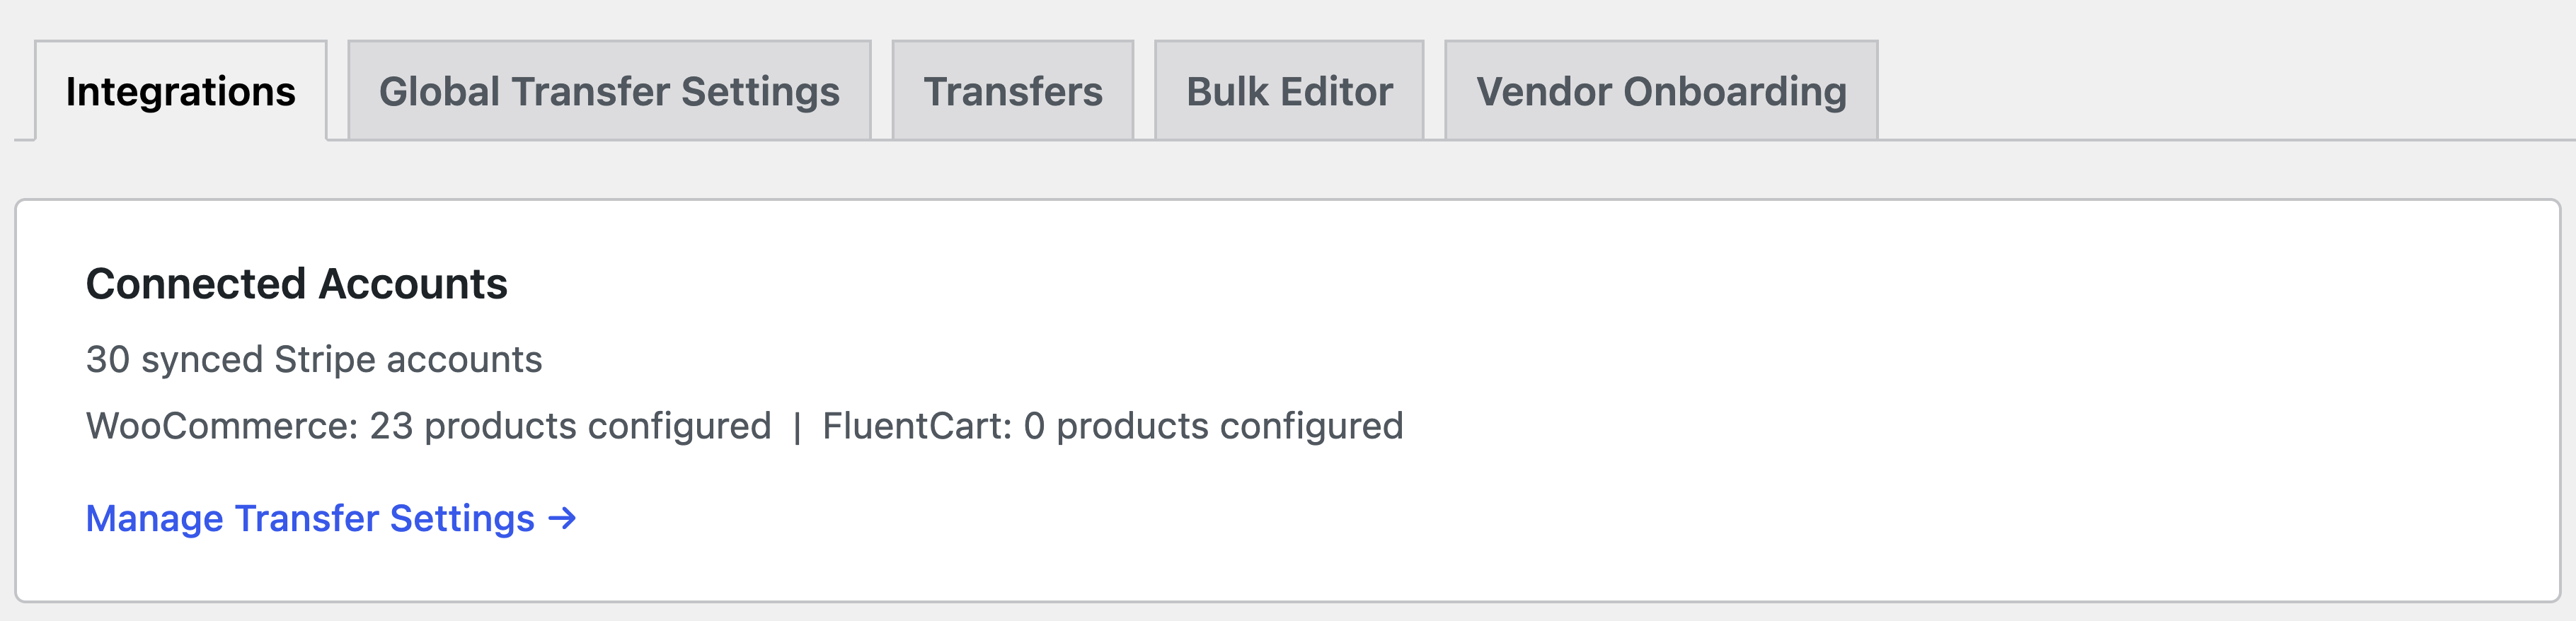
Once the Stripe gateway is connected, you need to give Split Pay its own set of API keys and sync your connected accounts. In the WordPress admin sidebar, click the top-level Split Pay menu. The settings page opens on the Integrations tab, which shows a Connected Accounts summary at the top followed by one card per detected platform and Stripe gateway.
Menu moved in v3.7.0. Before 3.7.0 the plugin’s settings page lived under WooCommerce → Settings → Payments → Split Pay. It is now a top-level Split Pay menu, visible regardless of whether your store runs WooCommerce or FluentCart. Direct URL: /wp-admin/admin.php?page=bsd-split-pay-stripe-connect-woo-settings.
Adding your Stripe API keys
Split Pay needs its own secret key (separate from the keys saved in your Stripe gateway plugin) to create transfers and manage webhooks. You’ll find your secret keys in the Stripe Dashboard → Developers → API keys.
On the Integrations tab, find the card for your Stripe gateway and click its Settings button. The panel expands inline, showing the gateway’s detected key and mode, plus two key slots:
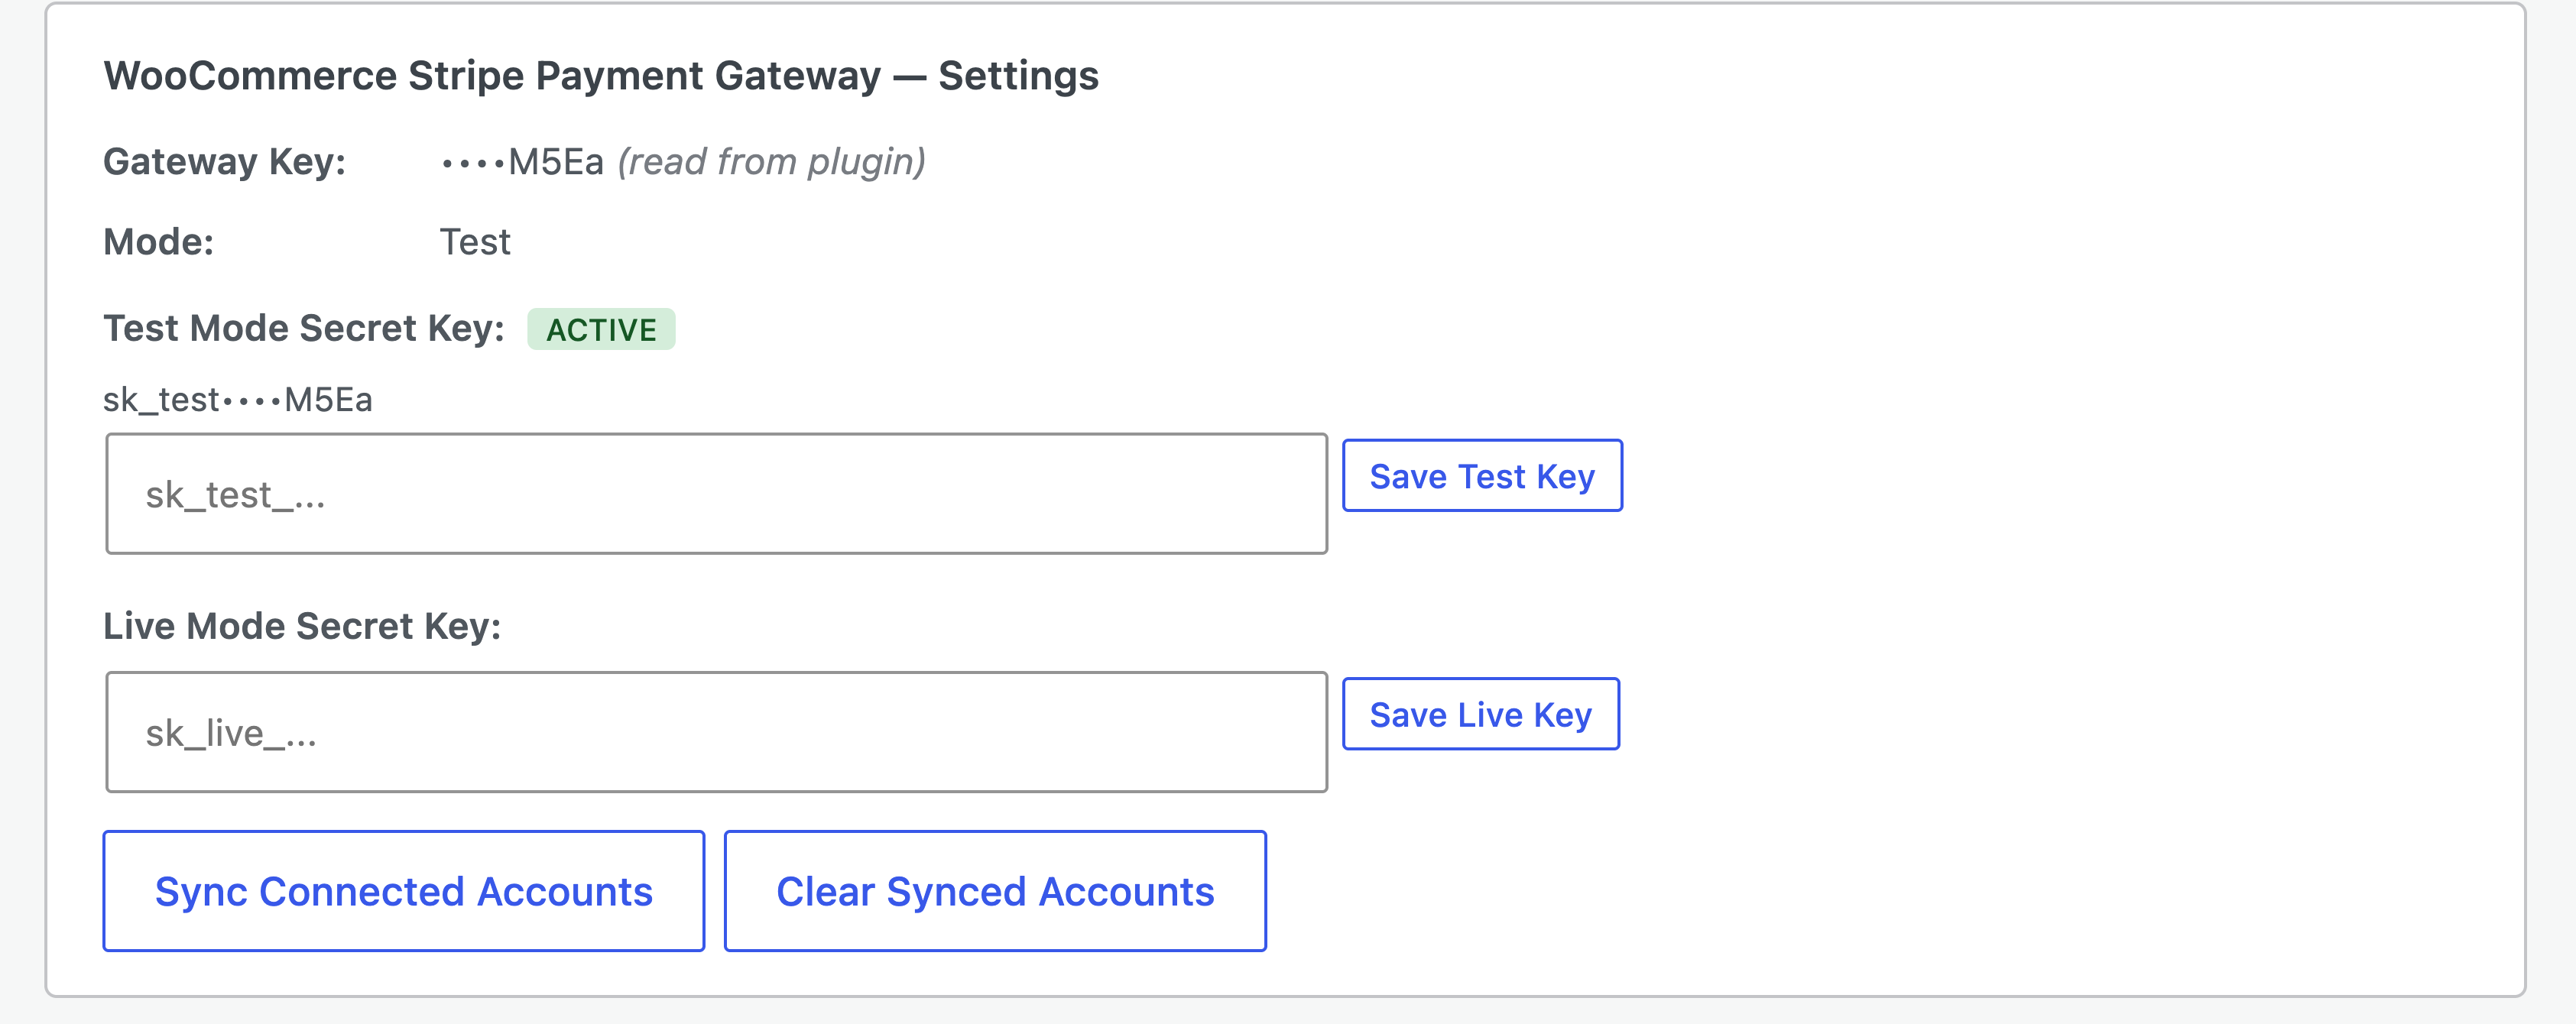
- Test Mode Secret Key — for development and testing. Starts with
sk_test_(orrk_test_for restricted keys). Paste it and click Save Test Key. - Live Mode Secret Key — for processing real payments. Starts with
sk_live_(orrk_live_). Paste it and click Save Live Key.
Each saved slot shows a masked key tail (e.g. sk_test••••M5Ea), and the slot matching the gateway’s current mode gets an ACTIVE badge. You only enter secret keys here — Split Pay reads publishable keys directly from your Stripe gateway plugin, so there is nothing else to paste.
Built-in key validation. Split Pay validates keys on save: secret keys must start with sk_test_, sk_live_, rk_test_, or rk_live_, and each slot only accepts keys for its own mode. If a key has an invalid format, you’ll see an error and it won’t be saved. The plugin also displays an admin notice on other WordPress pages if your configuration is incomplete (missing API keys or unsynced webhooks).
Use your platform’s API keys — not a connected account’s keys. The keys must belong to the Stripe account that receives the initial payment and creates transfers. Using a connected account’s keys will cause “No such connected account” errors.
Syncing webhooks
After saving your key, click the Sync Webhooks button on the gateway’s card (next to Settings and Manage Stripe). This tells Split Pay to make sure a webhook endpoint on your Stripe account listens for transfer events (transfer.created, transfer.reversed, transfer.updated).

These webhooks allow the plugin to track the status of transfers and update order notes accordingly.
If the sync succeeds, a green message appears next to the button (e.g. “Test: synced 1 endpoint(s)”) and the webhook endpoint will appear in your Stripe Dashboard → Developers → Webhooks.
If the sync fails, a red error message appears in the same spot — the most common causes are listed in the troubleshooting section below.
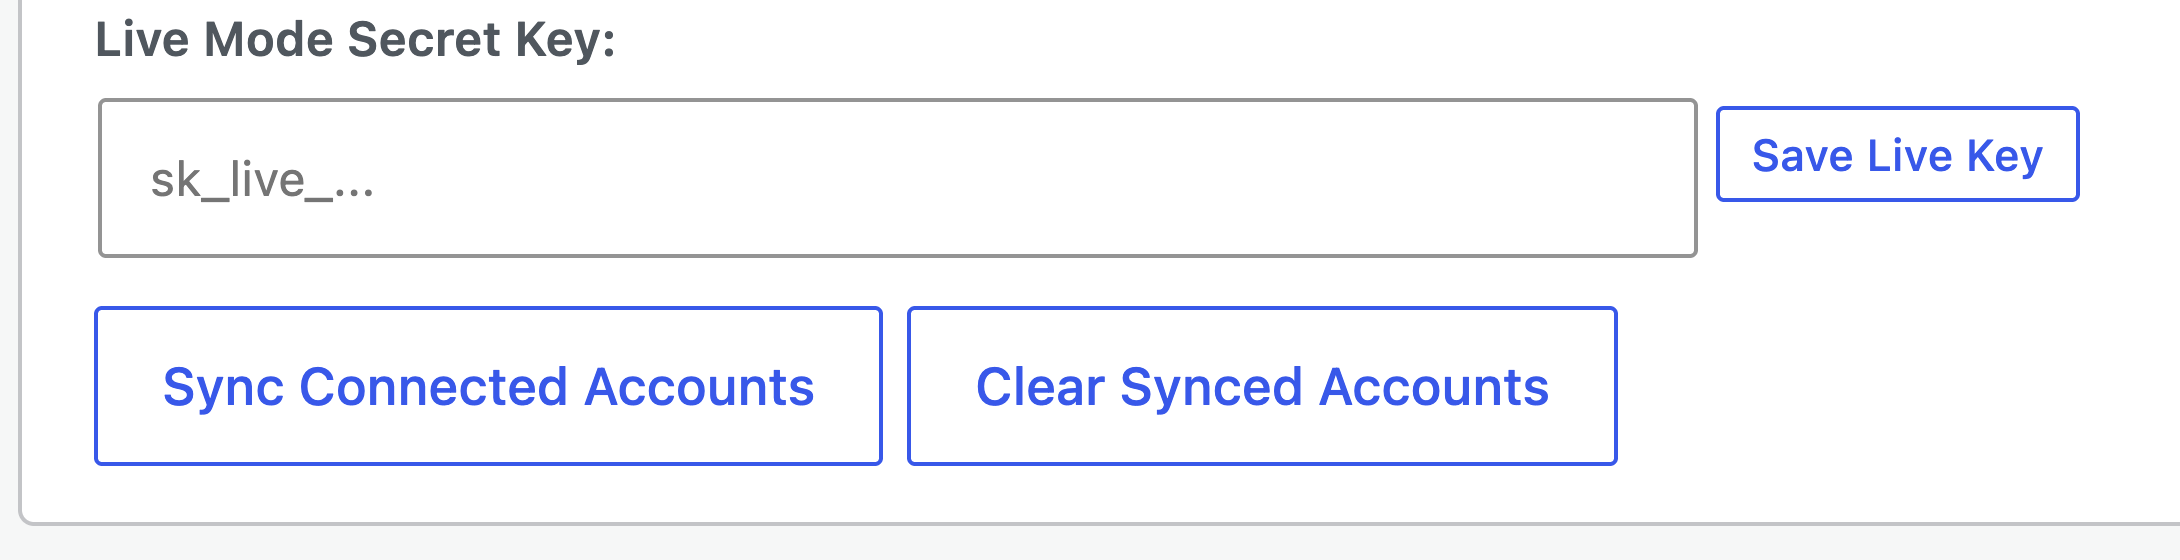
Syncing Connected accounts
Inside the same expanded Settings panel, click Sync Connected Accounts to pull all connected Stripe accounts into the plugin. This fetches the list of accounts connected to your platform so you can select them in transfer rules. (Clear Synced Accounts removes the locally stored list if you ever need to start fresh.)
Once the sync finishes, the Connected Accounts panel at the top of the Integrations tab shows the synced account count and how many products have transfer rules configured per platform. If you add new connected accounts in the future, click Sync Connected Accounts again to refresh the list.
Webhook sync failures#
If the webhook sync fails — a red error message next to the Sync Webhooks button instead of the green confirmation — check these common causes:
- Wrong mode connection: Make sure your Stripe gateway mode (Test/Live) matches the API keys you entered in Split Pay. The gateway is whichever Stripe plugin you configured above — the official WooCommerce Stripe gateway, Payment Plugins’
woo-stripe-payment, or FluentCart’s built-in Stripe module. If the gateway is in test mode, use test API keys. - Transfer events not configured: If you’re using a restricted API key, it must have permission to access transfer events. See Adjusting API Key Permissions below.
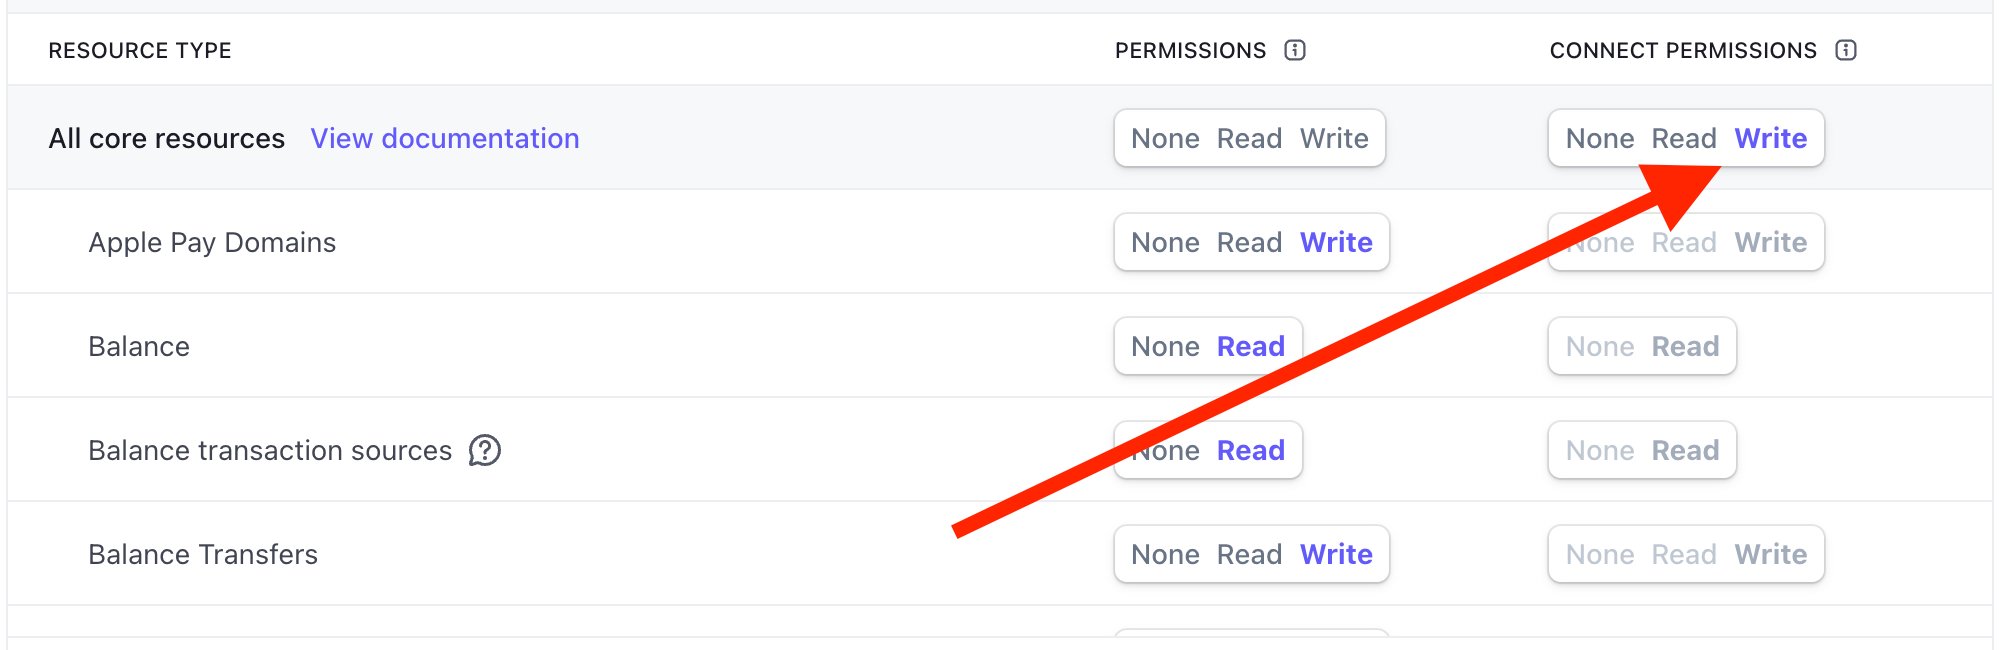
- Incorrect API key permissions: Restricted keys need the Connect → Transfers permission set to Write at minimum. (Stripe’s current Dashboard nests this under Connect; older docs sometimes refer to it as “Balance Transfers: Write”.) Keys with read-only access cannot create webhooks or transfers.
- Inactive restricted key: Stripe automatically limits the access of restricted API keys that have not been used for 180 days. The key isn’t deleted, but transfer/webhook calls start failing. If your sync was working last quarter and stopped without you changing anything, the key may have been auto-limited — rotate to a new restricted key in the Stripe Dashboard.
- Connected account keys instead of platform keys: You must use API keys from your platform Stripe account — the account that processes the initial payment. Connected account keys won’t work.
Updating transfer events manually#
If the automatic webhook sync didn’t add the required transfer events, you can add them manually in the Stripe Dashboard:
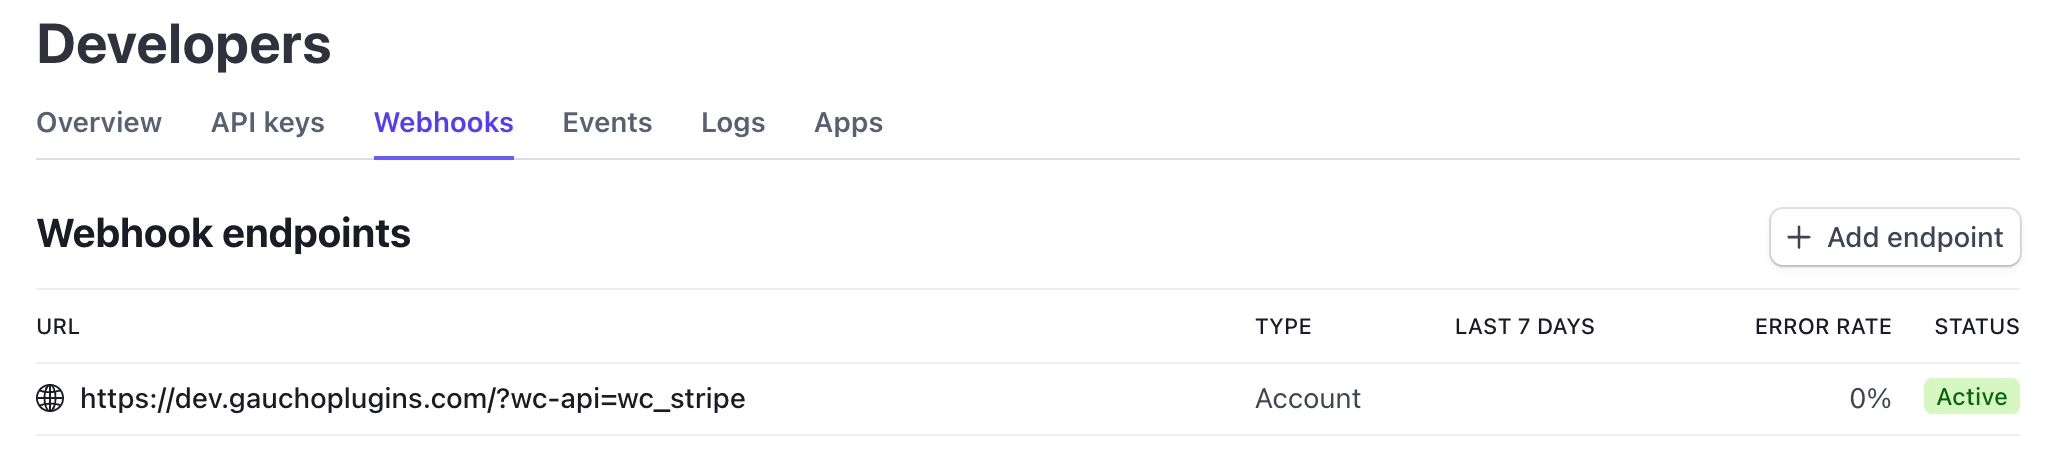
Open the Stripe Dashboard and go to Developers → Webhooks.
Find the webhook endpoint for your store. Split Pay attaches transfer events to your gateway’s webhook endpoint — for the official WooCommerce Stripe gateway it points to your site’s URL with a path like /?wc-api=wc_stripe. Click on it to open the details.
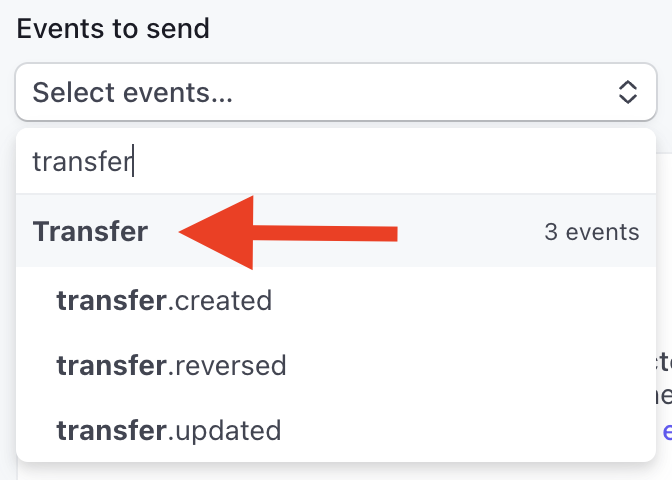
Click “Update details” (or “Edit endpoint”) and scroll to the events section.

Add the following events if they aren’t already listed:
transfer.createdtransfer.reversedtransfer.updated
Save the webhook endpoint. Transfers will now be tracked against your store orders (WooCommerce or FluentCart, depending on your stack).
Adjusting API key permissions#
If you’re using restricted API keys (recommended for production), the key must have the correct permissions. Here’s what to check:
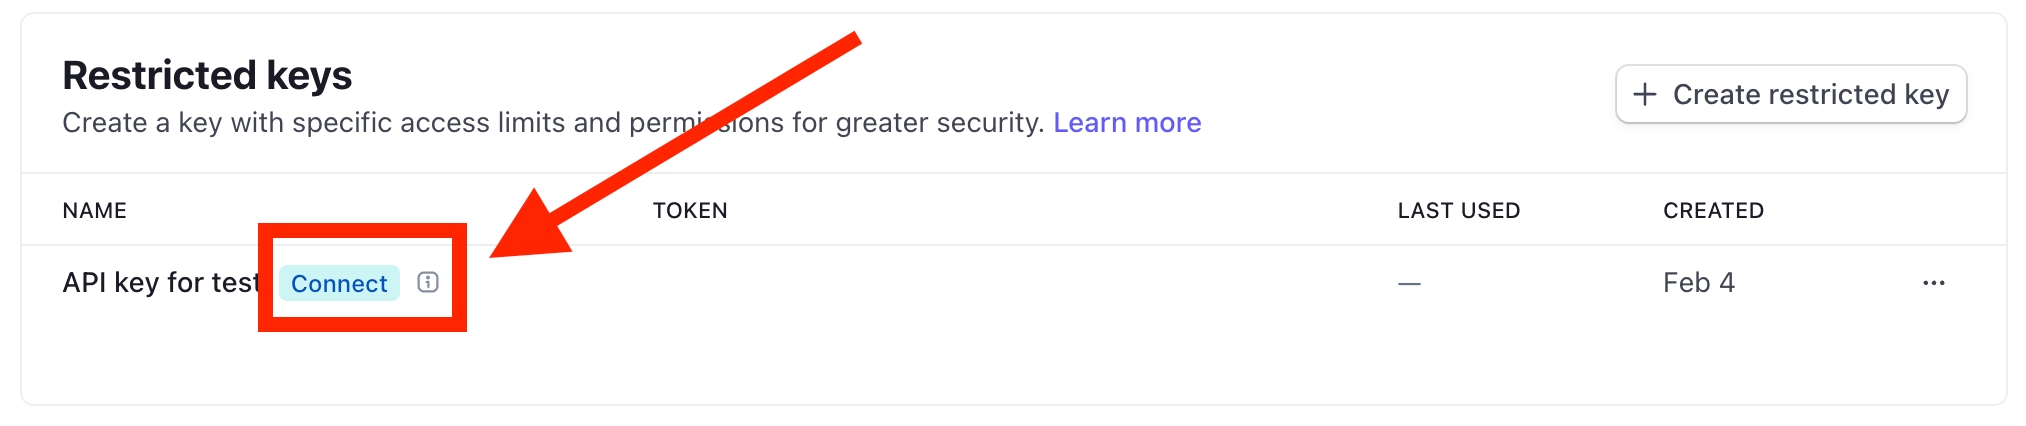
Go to the Stripe Dashboard → Developers → API keys and find the restricted key you’re using.
Verify the Connect-scoped permissions. The restricted key should be configured with at least one Connect permission enabled (Stripe used to surface this as a separate “Connect” badge on the key list; current Dashboard versions show the permission inline when you edit the key). If your key has no Connect permissions, create a new restricted key and tick the Connect category boxes described below.
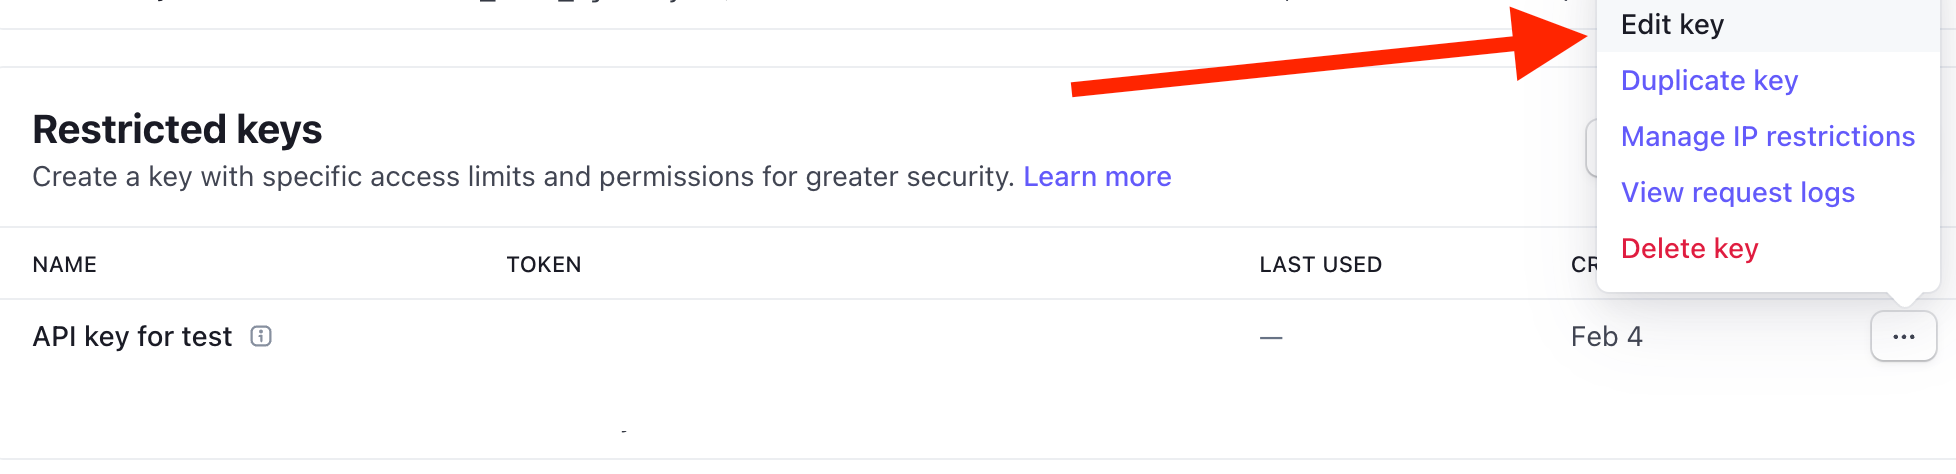
Edit the API key permissions. Click on the key to edit it.
Enable Connect → Transfers: Write. Under the key’s permissions, find the Connect → Transfers resource and set it to Write. This allows the key to create, update, and reverse transfers. (Older Stripe Dashboard versions labelled this resource Balance Transfers; the underlying API is the same.)
Enable Webhooks: Write (optional but recommended). This lets Split Pay automatically create and manage its webhook endpoint. Without this, you’ll need to create the webhook manually.
Save the key and update it in the gateway’s Settings panel on the Integrations tab. Click Save Test Key or Save Live Key for the matching mode, then re-run “Sync Webhooks” and “Sync Connected Accounts”.
You’re all set! Once your API keys are saved, webhooks are synced, and connected accounts are pulled in, you’re ready to configure your first transfer rule. Head to the How to Transfer Payments section to learn about global and product-level transfers.